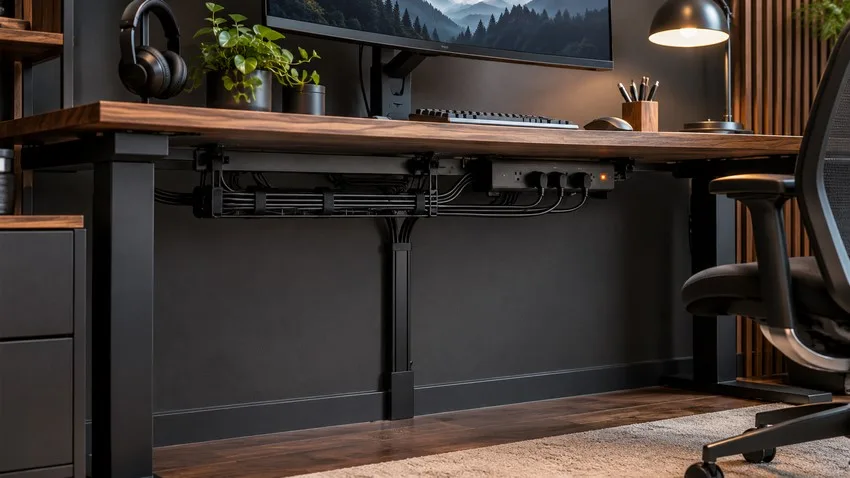
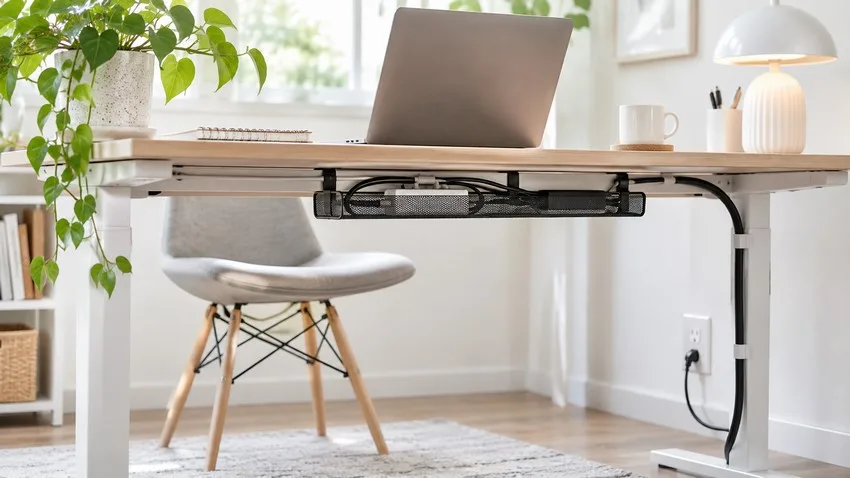
To organize cables under your desk, choose a route first, support the heavier items, and use clips or reusable ties to guide the remaining cords. Keep everyday charging leads accessible, leave enough cable for anything that moves, and check the whole setup before tightening the final bundle.
The aim is a workspace you can clean, adjust and troubleshoot easily. A perfectly hidden bundle is not very useful if you must dismantle it every time you unplug your laptop.
Start with the equipment you already have. You may only need a few reusable ties and a better route; a tray becomes useful when loose cables and suitable accessories need more support beneath the tabletop.
1. Map the cables before buying organizers
Take a photo of the existing connections and identify both ends of each cable. Shut down equipment as appropriate and disconnect power before rerouting or installing mounts. Inspect cords and replace damaged ones rather than hiding them inside a sleeve.
Sort the connections by how you use them:
Usually left connected: monitor power, a desktop computer, speakers and a desk lamp.
Frequently disconnected: laptop charging, a docking cable, a headset and phone charging.
Connected to moving equipment: monitor-arm cables, wired peripherals and any cable running between a height-adjustable desktop and a fixed point.
Remove unused leads and label confusing ones near the connector. Choose plain labels such as “Left monitor” or “Laptop charger.” Leave any manufacturer identification and electrical ratings visible.
Then sketch a simple route: devices to the back of the desk, along a supported area underneath, and down toward the appropriate connection point. Plan around drawers, your knees, chair wheels and the desk frame.
2. Match each accessory to a specific problem
What common cable-management accessories actually do
Accessory
Useful for
Check before buying
Cable tray or basket
Supporting loose cable runs and items the tray is designed to hold
Usable space, load limit, mounting method and access to plugs
Cable clips
Guiding individual leads or keeping charging ends within reach
Cable diameter, attachment method and surface compatibility
Reusable hook-and-loop ties
Grouping cables that follow the same route
Length and an adjustable fit that does not squeeze the cords
Split cable sleeve
Keeping a shared run together while allowing access
Bundle diameter, branch points and ease of adding or removing a lead
Cable spine or flexible chain
Guiding a changing vertical run on a compatible standing desk
Travel range, attachment points and the desk manufacturer’s guidance
Choose the smallest set that solves your actual problems. A sleeve groups cables but does not replace a load-bearing mount. A clip can guide a lead, but should not carry a heavy adapter unless it is specifically designed for that purpose.
3. Choose a tray that fits your desk and equipment
Measure usable space, not just overall width
Check the space beneath the desk for frame rails, drawers, monitor clamps and control boxes. A tray can match the tabletop width and still collide with something underneath.
Measure any equipment you intend to place inside it, including plugged-in connectors and the room needed to bend cables naturally. A power strip that fits as an empty rectangle may not fit once bulky plugs are attached. Keep its switch and connections reachable.
Check clamp compatibility
A clamp-on tray avoids drilling, but its clamp must suit the tabletop thickness and edge shape. For example, IKEA lists a 1.2–4 cm clamping range, approximately 0.47–1.57 inches, for its FÖRSÄSONG tray. That range applies to that model, not to clamp-on trays generally.
Inspect the underside as well as the top edge. A deep apron, beveled edge or nearby frame member may prevent the clamp from seating correctly. Check the desk manufacturer’s restrictions for glass, hollow-core or other sensitive tops.
Check screw-mounting requirements
For a screw-mounted tray, confirm that the desk permits the installation and use the specified hardware and mounting points. Screw length must be suitable for the tabletop and bracket. Do not guess from the thickness visible at the edge; the construction beneath may differ.
4. Route cables without turning them into one permanent bundle
Lay out the route loosely before fastening anything. Support equipment using mounts or trays intended for its weight, then guide cables between those points.
Keep leads you unplug regularly separate from the main bundle. A charging cable can end in a suitable clip at the back or side of the desktop, while a permanently connected display cable follows the underside route.
Use reusable ties at convenient points rather than cinching every cable tightly together. Allow gentle bends, avoid pressure on connectors and follow any cable-specific bend-radius guidance. If a connector pulls sideways when you release the cable, adjust the support or route.
Leave enough accessible length to disconnect a device without opening the whole bundle. Manage modest excess in loose, supported curves. Do not pack long spare power cords into a tight coil simply to hide them.
5. Organize desk cables without drilling
For a rented workspace or a desk you do not want to modify, start with a compatible clamp-on tray and reusable ties. Existing cable channels or approved mounting points may already solve part of the problem.
Adhesive clips can guide lightweight leads when the surface and product instructions allow it. Check preparation, application temperature, curing time and removal instructions. Test compatibility where advised; “no drilling” does not automatically mean “no surface damage.”
Avoid relying on small adhesive clips to suspend a loaded power strip or heavy charger. Use a purpose-made mounting solution with an appropriate rating and follow both the mount’s and device’s instructions.
If clamps do not fit and adhesives are unsuitable, use a stable organizer designed for the intended position rather than improvising a hanging load. Leave switches, vents and plugs accessible.
6. Leave room for standing desks and monitor arms
A standing desk changes the distance between the desktop and fixed outlets or equipment. Identify every cable crossing that moving boundary, including power, Ethernet and any connection to a computer that stays on the floor.
Leave enough free length for the desk’s full permitted travel. When the manufacturer allows a power strip to be mounted to the moving assembly, this can reduce the number of separate leads running down to the floor. It does not eliminate the need to manage the remaining connections.
After routing, move the desk slowly through its range, keeping clear of moving parts and watching for tight cables, pinches and snagging. Stop if anything catches. Follow your desk’s instructions rather than applying a generic slack measurement.
Monitor arms need a separate check. Move the screen through its intended positions and inspect the cable route at each joint. UPLIFT Desk’s Range-X instructions specifically call for enough slack for the arm’s full movement and warn against pinching or binding wires.
7. Keep power connections accessible and properly used
Use a power strip suitable for your country’s electrical system and the connected equipment, within its stated rating. Follow its mounting and ventilation instructions. ESFI advises plugging multiple-outlet strips directly into installed wall outlets rather than chaining them together.
Do not route cords beneath rugs, crush them behind furniture or fasten them with staples. Keep power connections away from drinks and stop using damaged or overheating equipment. If you need additional permanent outlets, have an appropriately qualified electrician assess the installation.
A decorative cable box is not a reason to ignore heat or access. Check whether it is intended for the equipment you want to enclose, and follow the equipment’s own clearance requirements. Keep adapters uncovered where their instructions require ventilation.
A simple setup for a laptop and one monitor
For a small fixed-height desk, try this arrangement:
Guide the monitor cable toward the rear of the desk using its stand’s built-in routing, if provided.
Keep the laptop connection accessible near the usual docking position.
Use a compatible tray or approved mounts for the equipment and cable runs that need support.
Group shared runs loosely with reusable ties, leaving a convenient branch for the laptop lead.
Route the wall connection away from feet and chair wheels, without trapping it under a rug.
This is an example layout, not a required shopping list. If the desk already has effective routing, you may only need a few ties and one reachable cable clip.
Before you finish: a practical check
Can you move the chair and sit comfortably without touching the tray?
Can you unplug the laptop without disturbing other connections?
Are adapters supported rather than hanging from their cords?
Do drawers, monitor arms and any height adjustment move freely?
Are switches, connectors and equipment ventilation accessible?
Can you clean underneath without dragging a cable bundle?
Frequently asked questions
What is the easiest way to organize cables under a desk?
Remove unused leads, choose a route along the back of the desk and group shared runs with reusable ties. Add a compatible tray only where cables or suitable equipment need support. Keep charging ends you use daily within reach.
Can I manage desk cables without drilling?
Yes. Compatible clamp-on trays, existing routing points and suitable adhesive clips can help. Check tabletop construction, clamp clearance and surface instructions before choosing a mount.
Is a cable tray better than a cable sleeve?
They do different jobs. A tray supports items beneath the desk; a sleeve keeps a cable run together. Some setups benefit from both, while a simple desk may need only reusable ties and a few clips.
How much slack does a standing desk need?
Enough for every connection to remain free of tension throughout the desk’s full permitted travel. The required length depends on attachment points, outlet position and equipment placement. Check the manufacturer’s routing instructions and inspect movement slowly.